
Setting up the RFID scanner
-
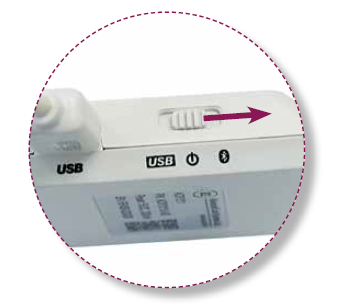
Turn on the RFID reader
- Slide the RFID switch over to the Bluetooth logo. It will beep and a blue light will flash.
- The RFID reader must be plugged into a power source permanently.
-
Turn on Bluetooth on your iPad
- Click on the iPad settings App

- Then lick on Bluetooth in the left menu.
- Ensure the Bluetooth toggle is switched to “green”
- Exit Settings by clicking the iPad home button.
- Click on the iPad settings App
-
Connect the RFID reader to the Passtab iPad App
- On the iPad home screen. Click on the Passtab icon.

- Once Passtab has opened, tap your logo approx. 10 times to reveal the hidden menu.
- Click on “RFID settings”
- Then click “Scan for RFID Reader”
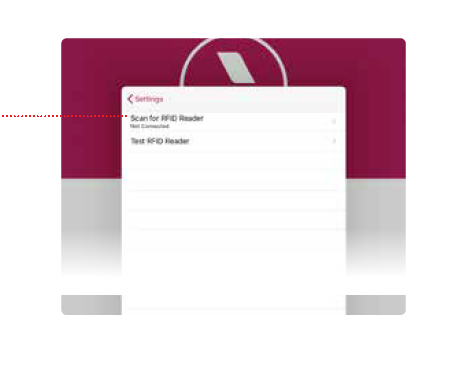
- Click the name of your RFID Scanner listed. It will start with the letters ACR.

- If you can’t see your RFID Scanner listed, turn the unit off and back on by sliding the switch to the centre and back to the Bluetooth side. It should now appear on the screen.
- Once you’ve clicked the RFID reader in the list, your RFID reader is now connected to the Passtab iPad App.
- On the iPad home screen. Click on the Passtab icon.
-
Test the RFID reader connection
- From the RFID settings menu click “Test RFID Reader”
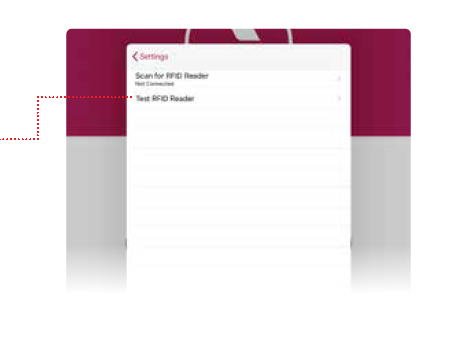
- Tap your RFID card on the RFID reader. When you tap the card the reader will beep and you will see the number Passtab associates to that with that card appear in the on screen list. No beep? No serial number on screen? Click here
- Check this number is the same number you understood that RFID card to be. The serial number appearing on screen will be the number that must be linked to the Passtab Quickpin profile for the person who uses that card. If the serial number that appears in the on screen list is not the number you expected, click here for help
- To finish your setup click Settings then the “Done” button on the iPad settings menu.
- From the RFID settings menu click “Test RFID Reader”
-
Have you set-up RFID scanner onto your iPad stand yet?