
HID set-up instructions for the iPad Desk Stand
Attach HID mounting plate to iPad stand
-
Put the iPad into mounting position
- Tilt the iPad stand bracket to the horizontal position.
- This makes it easier to mount the bracket.
-
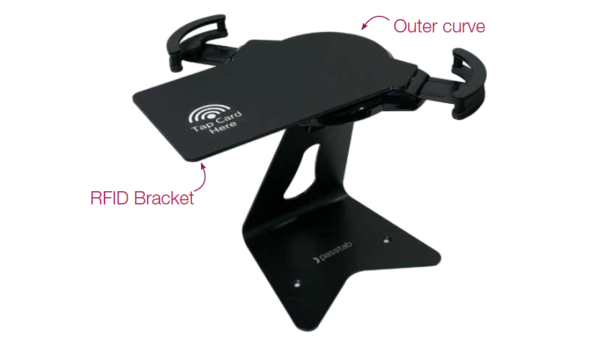
Fasten the HID mounting plate
- Remove the backing from the double sided tape on the rear of the mounting plate.
- Position the mounting plate onto the stand by lining up the outer curve so the bracket sits in position on the stand.
- The mounting plate should be overhanging to the left, with one stand bracket above it on the left and below it on the right.
-
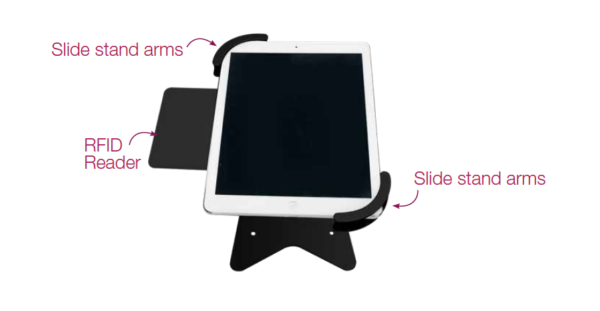
Lock the iPad into the stand
- Position iPad over the top of the bracket with the top left corner of the iPad fitting into the top left bracket and the bottom right corner of the iPad fitting into the bracket at the bottom right.
- Switch the toggle at the rear of the stand and use the key to lock in place.
-
Tilt iPad
- Tilt the iPad in the stand to the desired angle, in a portrait position.
- Should you wish to set your iPad in a landscape position please email support@invision.net.au Our configurations team will change the on screen arrow that points “left” to point in the correct direction based on your iPad orientation.
Setting up the HID scanner
-
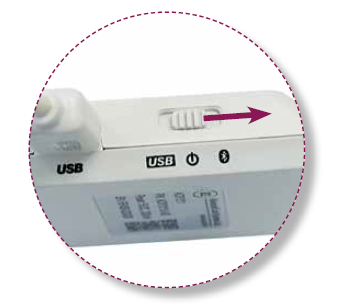
Turn on the HID reader
- Slide the HID switch over to the Bluetooth logo.
- The HID reader must be plugged into a power source permanently.
-
Turn on Bluetooth on your iPad
- Click on the iPad settings App

- Then lick on Bluetooth in the left menu.
- Ensure the Bluetooth toggle is switched to “green”
- Exit Settings by clicking the iPad home button.
- Click on the iPad settings App
-
Connect the HID reader to the Passtab iPad App
- On the iPad home screen. Click on the Passtab icon.

- Once Passtab has opened, tap your logo approx. 10 times to reveal the hidden menu.
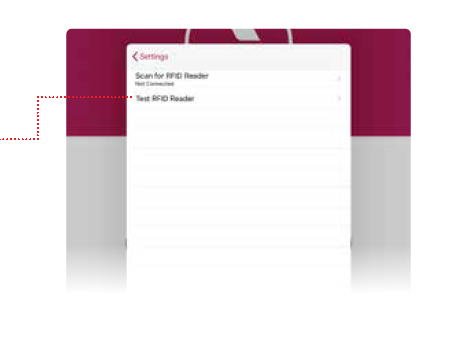
- Click on “RFID settings”
- Then click “Scan for RFID Reader”
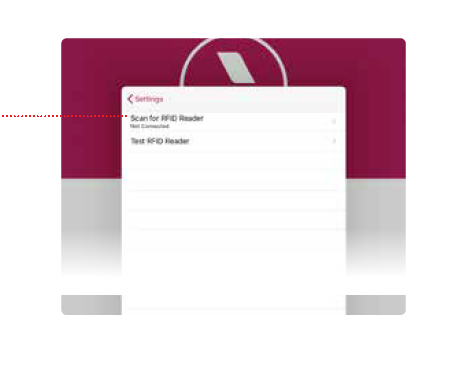
- Click the the scanner ID CHamp NF4 that is listed.

- If you can’t see your HID Scanner listed, turn the unit off and back on by sliding the switch to the centre and back to the Bluetooth side. It should now appear on the screen.
- Once you’ve clicked ID Champ NF4 in the list, your HID reader is now connected to the Passtab iPad App.
- On the iPad home screen. Click on the Passtab icon.
-
Test the HID reader connection
- From the RFID settings menu click “Test RFID Reader”
- Tap your HID card on the HID reader. When you tap the card the reader will beep and you will see the number Passtab associates to that with that card appear in the on screen list. No beep? No serial number on screen? Click here
- Check this number is the same number you understood that HID card to be. The serial number appearing on screen will be the number that must be linked to the Passtab Quickpin profile for the person who uses that card. If the serial number that appears in the on screen list is not the number you expected, click here for help
- To finish your setup click Settings then the “Done” button on the iPad settings menu.
- From the RFID settings menu click “Test RFID Reader”
-
Activate HID on your Passtab account
- Our configurations team will activate the HID module on your Passtab account
- Please email support@invision.net.au with the following details:
I have connected the HID reader and successfully done a test tap that resulted in a “beep” and a serial number on screen.
Please configure my Passtab account for HID.